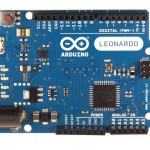
Anyone with an Arduino Leonardo or Micro or Esplora does know that after a reset the board will wait for about 8 seconds before to run the sketch stored into the Flash memory: this waiting is marked by the flashing of the integrated LED. This delay has been inserted to let a user to flash a new sketch into the main memory of the board. However, this time is objectively too long. Thanks to the presence of the sources (power of open-source!) we can modify the bootloader to adapt it to our own needs. Here is the directions to change it introducing a delay of only 3 seconds.
[notice]N.B.: the instructions below are valid for a Linux box, but with few modifications you could adapt them for other OSs.[/notice]
- The first thing to do is to check if you have the tools needed to compile a program by its C/C++ sources: depending of the distro you’re using, the pckages may vary but usually you need make, gcc, autoconf, automake.
- Now you have to download the sources of the LUFA project v. 111009, a driver that let you interface with USB via software.
- Unpack it, then copy the folder named
LUFA-11109inside the folder/arduino-1.0.5/hardware/arduino/bootloaders. - Now you have to do some changes to the bootloader’s Makefile. Open the file
/arduino-1.0.5/hardware/arduino/bootloaders/caterina/Makefilewith a text editor, i.e. Geany on LInux boxes or Notepad++ on Windows sistems (on Windows OSs, don’t use Notepad) and change the followings:
- remove the comment char (#) at line number 52, so that it will look like this:
VID = 0x2341 - remove the comment char at line number 57, so that it will look like this:
PID = 0x0036 - finally, change line number 130 to the following
LUFA_PATH = ../LUFA-111009
- The next step you’ll modify the bootloader sources. Open the file
/arduino-1.0.5/hardware/arduino/bootloaders/caterina/Caterina.cand go to line number 65. The original line looks like this:
#define TIMEOUT_PERIOD 8000
The number in bold indicates the number of milliseconds the bootloader will wait for before to run the user’s sketch. Change that number with any number that feets your own needs, i.e. 3000 for a delay of 3 seconds or 5000 for a delay of 5 seconds. - Now the last thing to do is recompile the sources. Open a terminal into
/arduino-1.0.5/hardware/arduino/bootloaders/caterina/and digit the following commands:
make clean
make all - If everything has gone right, you should find a new file called
Caterina.hex. This is the new bootloader that you have to flash on the board using a programmer (i.e. USBtinyISP) or an Arduino UNO with the ArduinoISP sketch. - To write the new firmware you have to change the original file with the new bootloader: depending of the board you have, overwrite the file
Caterina-Leonardo.hex,Caterina-Micro.hexor Caterina-Esplora.hex. with the new hex file.
After changed the booloader, connect the board to the cmputer and press the reset button (this step is needed to call the bootloader): you’ll notify that this time the LED flashing lasts for the time you set into the sources.


Greetings,
Would you be willing to post your new Caterina.hex file for download?
Thank you.
I’ll publish it as soon as possible
Here they are

PS: not tested yet (I didn’t have time)…